Tailored Tag Two Patchwork card!!


Today I have another patchwork card to share with you but I have mixed it up by changing out the designer series paper for a totally different look. Today's card uses the brightly gleaming paper on a night of navy base. 

For the sentiment I used pretty peacock as I felt the night of navy was a bit too dark. What do you think? 
These cards are rather addictive! 

I would love to see what you come up with, comment below and let me know.

Product List
your photo name

Tailored Tag patchwork card


Today I am sharing a class project we had fun making in our monthly stamp a stack class this month. Using the tailored tag punch we made a patchwork card using the fun Trimming the Town designer series papers. This is one of the paper packs on sale this month too - win win!! 


By using a pack of papers you are assured that all the colours will co-ordinate without spending hours matching scraps :)


The JOY sentiments come from the Peace and Joy bundle - I love this bundle! I love being able to layer the sentiments (in this case using vellum as my base) 

I used old olive as my base card then added a layer of poppy parade. I like to use the multipurpose glue and the silicone mat for these types of projects. The 'wet' glue give you a little wriggle room when placing your pieces together and the silicone mat saves you getting your project stuck to your desk - don't ask me how I learned that lesson!!)
 

Product List
your photo name

In the Pines and Evergreen Forrest


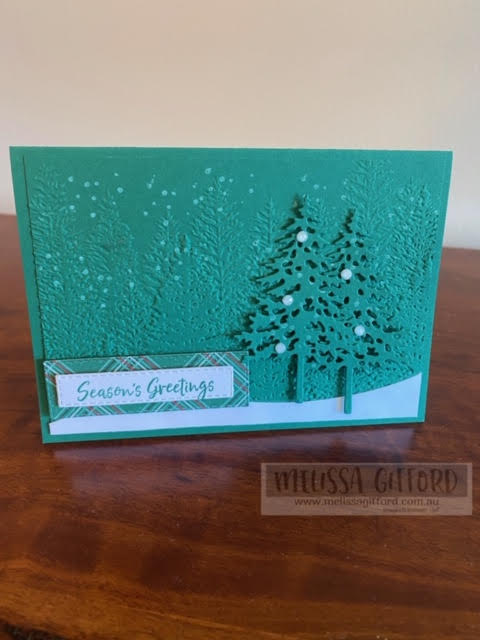
I love a monochromatic card design and Shaded Spruce would have to be my go to Christmas Green this year. The trick is to use texture to get the depth of design you need to make your card stand out. In this case, an embossing folder and the die cut trees. 


Here I cased a design from Karen's Stamping Habit  I was searching pinterest for cards using this amazing Evergreen Forrest Embossing folder. I love the snowy look even thought we don't have snow here where I live - and Christmas is in the summertime here in Australia!   

I stamped the background with the tiny snow stamp in the In The Pines stamp set them embossed the panel with the evergreen forrest embossing folder. I added two die cut trees and the snow drift panel from the In the Pines dies. The elegant faceted gems were perfect for the snow on the trees. 


Product List
your photo name

Slimline Happy Birthday - Good Morning Magnolia

I am loving making these slimline cards and have another one I forgot to share with you! This was for a purple loving, wink of stella, glittery gal! 

I stamped the magnolia flower in highland heather randomly on the card then used my water painter pens and white ink to 'colour' the petals. 

A liberal painting with the wink of stella pen was also applied :)

I also made an envelope to match, stamping the magnolia in the bottom left hand corner. 

Why not give these slim line cards a try? They are fun and easy and really make a super special card for the recipient. 

Product List 
your photo name

Happiest of Holidays - Merry Moose


Moose! I love him! This was a fun card we made in class a few weeks ago showcasing the Merry Moose bundle. So easy having a punch to create the moose. 

We used crumb cake and early espresso with a hint of garden green to make the tree and sentiment stand out. 


Product List
your photo name

Sending Love your way - Posted For You


Continuing on with the posted for you background design that I showed you a few days ago, I also created this card using rich razzleberry as my colour base. I thought that I cased this card from Allison @ Nice People Stamp but I cannot find the card again. If you know, please tell me so I can update this post and give credit where credit is due!!  

This time I didn't colour the flowers on the background instead choosing to colour the other images as the focal point using the postage stamp punch to punch them out. Love this punch!!   


Product List
your photo name